

Understanding the Dye Penetrant Testing Process Step by Step
Quality assurance in manufacturing and engineering relies on inspection methods that can identify defects before they become failures. Among surface inspection techniques, dye penetrant testing remains widely used because it reveals minute discontinuities that are otherwise invisible to the naked eye. At the heart of this method lies the careful use of a dye penetrant chemical, applied through a structured sequence that prioritises accuracy, repeatability and safety.
This inspection approach is valued not for complexity, but for discipline. Each stage builds upon the previous one, ensuring that surface-breaking flaws are detected clearly without damaging the component being examined. Understanding the process step by step helps industries maintain consistent inspection standards while reducing operational risk.
The Purpose Behind Dye Penetrant Testing
Dye penetrant testing is designed to detect surface-level discontinuities such as cracks, porosity, laps or seams in non-porous materials. It is commonly applied to metals, ceramics and certain plastics where surface integrity is critical.
By highlighting defects that may lead to fatigue or failure, the method supports preventive maintenance rather than reactive repair.
Preparing the Surface for Inspection
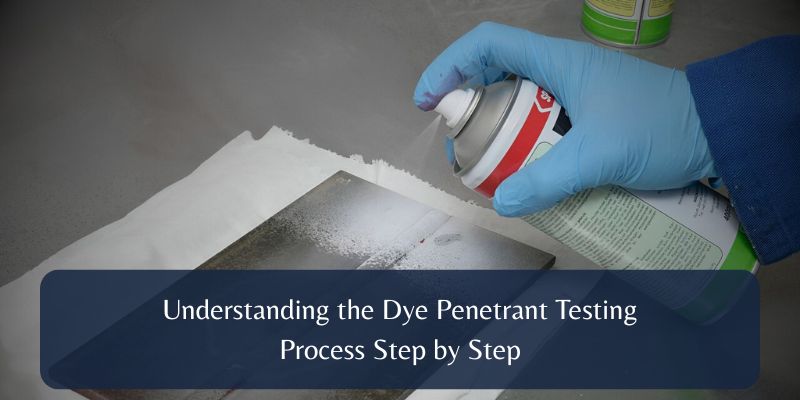
The process begins with thorough surface preparation. Any contamination—oil, grease, paint, rust or dust—can interfere with the penetration process and compromise results.
Cleaning ensures that the inspection medium can enter even the smallest surface openings without obstruction, setting the foundation for reliable detection.
Importance of Surface Cleanliness
Cleanliness is not optional. Residual contaminants may block openings or create false indications.
Effective preparation uses approved cleaning agents and controlled techniques to preserve the integrity of the surface while removing unwanted residues.
Application of the Penetrant
Once the surface is clean and dry, the penetrant is applied evenly across the inspection area. This stage allows the liquid to seep into surface-breaking flaws through capillary action.
Controlled application ensures uniform coverage without excessive pooling, which could obscure indications later.
Allowing Adequate Dwell Time
Why Timing Matters
- Enables full penetration into fine discontinuities
- Ensures consistent sensitivity
- Prevents incomplete flaw indication
- Balances inspection efficiency
- Supports repeatable results
Excess Penetrant Removal
After sufficient dwell time, excess penetrant must be removed from the surface without extracting material from defects. This step requires precision.
Improper removal can either leave background staining or wash out critical indications.
Techniques for Controlled Removal
Methods vary depending on the penetrant type, but all aim to clean the surface gently while preserving penetrant trapped in flaws.
Controlled removal ensures contrast between sound surfaces and defect areas.
Developer Application
The developer is applied next to draw penetrant out of defects and create visible indications. It acts as a blotter, enhancing contrast and making discontinuities easier to interpret.
Uniform application ensures consistent background and clarity.
Visual Development and Indication Formation
As the developer interacts with the penetrant, indications begin to form. These marks represent the size, shape and location of surface flaws.
This stage requires patience and controlled lighting to allow proper development without overexposure.
Interpreting the Results
Inspection interpretation relies on trained judgement. The shape, sharpness and distribution of indications provide insight into defect type and severity.
Accurate interpretation distinguishes between relevant flaws and benign surface features.
The Role of Inspector Expertise
Equipment and materials alone do not guarantee accuracy. Skilled inspectors understand material behaviour, process variables and acceptance criteria.
Their expertise ensures reliable decision-making.
Understanding the Dye Penetration Test
The dye penetration test is valued for its sensitivity and adaptability across industries. From aerospace to automotive fabrication, it supports quality assurance without altering component properties.
Its effectiveness depends on strict adherence to procedural discipline rather than automation.
Factors Influencing Test Reliability
Surface roughness, temperature, dwell time and material type all influence outcomes. Standardised procedures control these variables to maintain consistency.
Awareness of these factors supports dependable inspection results.
Chemical Behaviour and Performance
The effectiveness of penetrant testing is influenced by the dye penetrant chemical composition, which determines viscosity, surface tension and contrast properties.
Carefully engineered formulations balance penetration capability with ease of removal and clear indication development.
Environmental and Safety Considerations
Handling inspection chemicals requires adherence to safety protocols. Proper ventilation, protective equipment and disposal practices are essential.
Responsible use protects both personnel and the environment.
Common Applications Across Industries
Dye penetrant testing is widely used in welding inspection, casting evaluation and component maintenance.
Its versatility supports inspection of both new components and in-service parts.
Advantages of a Step-by-Step Approach
Structured procedures minimise human error and enhance repeatability. Each step reinforces inspection integrity.
Consistency is critical when inspections influence safety-critical decisions.
Limitations to Be Aware Of
While effective, the method only detects surface-breaking flaws and requires clean, non-porous surfaces.
Understanding limitations ensures appropriate method selection.
Documentation and Traceability
Recording inspection conditions, results and interpretations supports quality audits and traceability.
Documentation enhances accountability and process improvement.
Training and Standardisation
Consistent training ensures that procedures are applied uniformly across teams and sites.
Standardisation strengthens confidence in inspection outcomes.
Integration With Other Inspection Methods
Dye penetrant testing is often combined with other non-destructive techniques to provide comprehensive evaluation.
Integrated approaches reduce inspection blind spots.
Maintaining Equipment and Materials
Inspection reliability depends on properly maintained materials and tools. Expired or contaminated products compromise results.
Regular checks support inspection accuracy.
Long-Term Value in Quality Control
Early defect detection reduces repair costs, downtime and safety risks.
The method delivers value through prevention rather than correction.
Supporting Manufacturing Confidence
Reliable inspection supports trust in components before deployment.
Confidence in quality underpins operational performance.
Evolving Standards and Practices
Industry standards continue to refine best practices. Staying updated ensures ongoing compliance and effectiveness.
Adaptation supports long-term relevance.
The Importance of Process Discipline
The strength of this method lies in consistency. Skipping or altering steps undermines results.
Discipline ensures accuracy.
Final Perspective
Understanding each stage of dye penetrant testing highlights why the method remains essential in surface inspection. From preparation to interpretation, every step contributes to reliable flaw detection and informed decision-making. When performed correctly, the dye penetration test supports safety, quality and operational confidence across industries. At P-Met, this structured approach reflects a commitment to precision, consistency and inspection practices that stand up to modern engineering demands.